I accidentally deleted photos from my camera SD card after a family event, and now I can’t find them anywhere. The card is still being detected, but some pictures are missing and I’m worried they may be permanently lost. I need help with the best way to recover deleted photos from an SD card before I make things worse.
If your photos vanished from an SD card, stop using the card right away. I mean stop. Don’t shoot more photos, don’t record video, don’t let your camera keep saving stuff to it.
The mistake I see most is people deleting files, panicking, then using the card like nothing happened. That’s how old data gets overwritten.
Deleted does not usually mean the photo data vanished on the spot. Most of the time, the card drops the file entries, while the image data still sits there for a while. Recovery works best before new files land on those same blocks.
One more thing. If Windows pops up and says the card needs to be repaired or formatted, don’t hit yes yet. I’ve seen CHKDSK and similar repair tools make a mess of recovery by changing the file system before you even get a chance to scan it.
For recovery software, I’d go with Disk Drill. I’ve tried a pile of these tools over time, and this one tends to do well with SD cards without making the process a pain.
Why I kept coming back to it:
Where it tends to help
It’s useful for more than simple accidental deletion. I’ve seen it work in cases like:
- Formatted SD cards
- Corrupted partitions
- RAW cards
- Cards showing up empty even though storage space is still occupied
That last one happens more than people think. The card looks blank, but the used space tells a different story.
Basic recovery steps
- Put the SD card into your computer with a card reader.
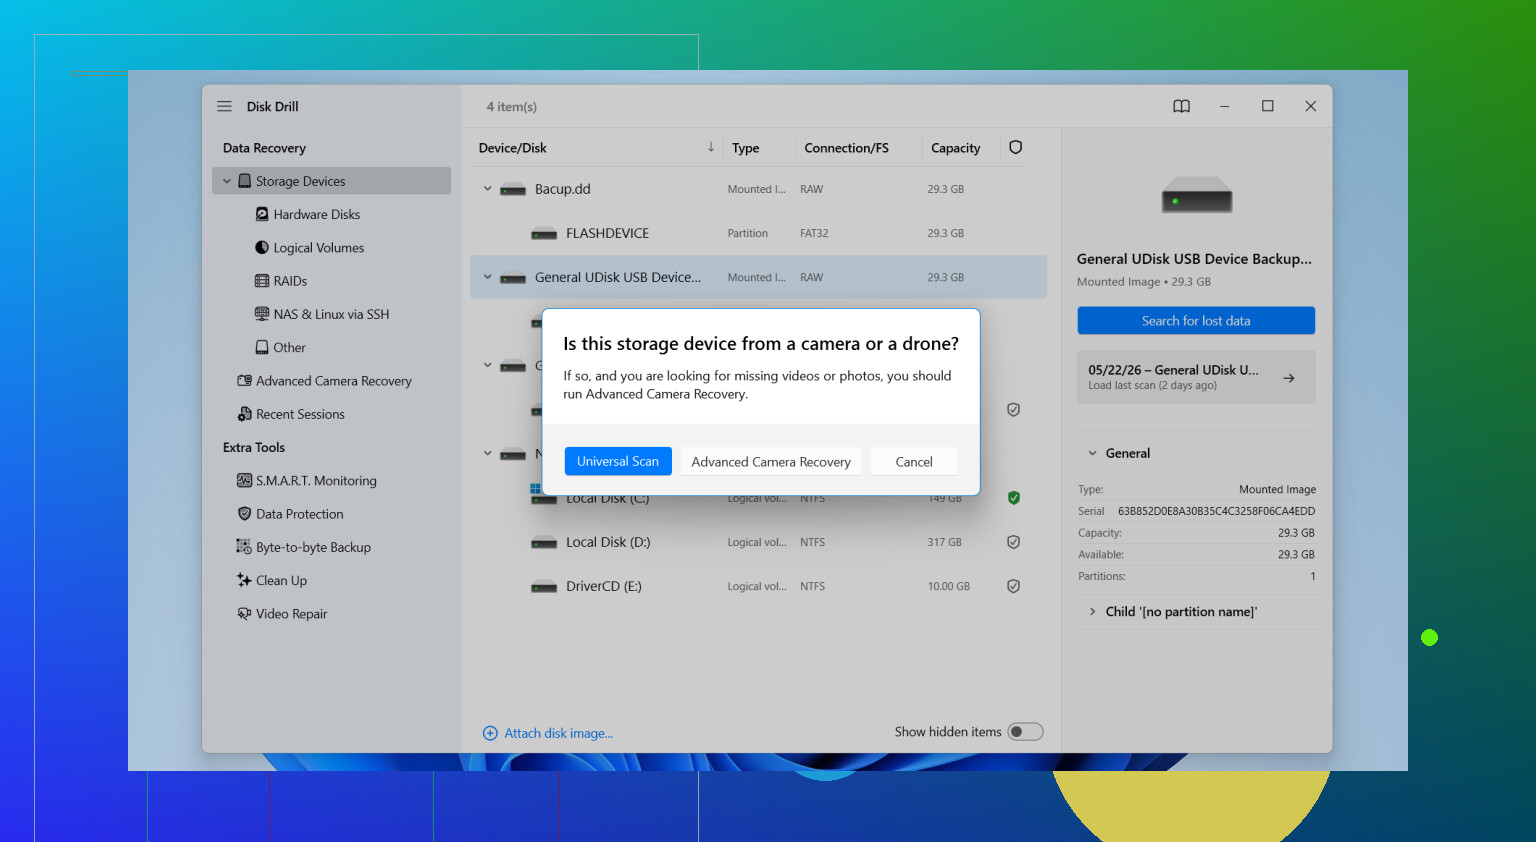
- Open Disk Drill and find the SD card in the device list.
- Start the scan.
- Let all scan stages finish.
- Check the Pictures section, or filter by file type.
- Preview the files.
- Recover them somewhere else, not back onto the same SD card.
That last part matters. Save the recovered files to your computer, an external drive, anything except the original card.
File types matter more than people think
Camera cards often hold RAW files and large video files, not only JPGs. This is where weaker tools fall apart. Disk Drill supports formats like JPG, PNG, CR2, CR3, NEF, ARW, RAF, DNG, plus a lot more. If you use a DSLR or mirrorless body, that support matters. A cheap tool might find filenames, then choke on the files you care about.
Preview saves time
The preview feature helps a lot. I’d rather check whether a photo opens before restoring 4,000 mystery files to a hard drive. It makes it easier to separate intact shots from broken ones.
If the card is unstable, do this first
If the SD card keeps disconnecting, acts flaky, or looks corrupted, making a byte-to-byte backup image first is usually the safer move. That gives you a full copy of the card, so you can work from the image instead of stressing the original media over and over.
Other places I’d check before giving up
Sometimes the files are already somewhere else and people forget. I’d look through these before spending hours scanning:
- Google Photos or iCloud sync
- Older backups on external drives
- Your camera’s internal storage, if it has any
- Imported copies on your computer
- Time Machine or Windows File History
When software stops being enough
If none of this works and the card has physical issues, professional recovery is the next move. It gets expensive fast, so most people try software first unless the SD card is clearly damaged.
Short version, stop using the card, don’t run repair tools too early, scan it with Disk Drill, and recover files to a different drive. That gives you the best shot without making things worse.
1 Like
First, stop using the SD card. You already got the key advice from @mikeappsreviewer on that part, and I agree with it.
Where I differ a bit is this. Before running any repair tool or even a full recovery scan, check whether the photos are only hidden or the folder structure got messed up. On Windows, turn on hidden files in File Explorer. On a Mac, press Command + Shift + Period in Finder. I’ve seen cards look empty when the files were still there.
Next, try copying the whole card to your computer. If normal copy fails, that tells you the file system is damaged, not only deleted. That info matters.
If the card is stable, Disk Drill is a solid pick for camera SD card photo recovery. It tends to find JPG and RAW files well, and the preview helps you sort out what’s intact. Save recovered files to your computer, not back to the card. Obvious, but people still do it and then wonder why stuff got worse.
If some pics are missing, but others are there, look at the camera too. Some cameras split photos across DCIM subfolders, and imports miss one folder. I’ve seen this with Canon and Sony cards more than once.
If you want a quick walkthrough, this SD card photo recovery video guide is short and easy to follow.
If the card disconnects, gets slow, or throws read errors, stop messing with it. At taht point, repeated scans do more harm than help.

If the card is still detected, I actually would not rush into “fixing” it first. That’s the one part where I’m a little more cautious than @mikeappsreviewer and @sterrenkijker. Even a card that looks mostly fine can go south fast if the controller is starting to fail.
What I’d do:
- Check the card’s actual capacity and used space
- If it still shows used storage, that’s a good sign the data may still be there
- Use a write-protect adapter if you have one, so nothing accidentally writes to it
- Recover from the card to your computer, never back to the SD card
Also, don’t assume “deleted” is the only issue. Cameras sometimes leave behind fragmented RAW/JPG sets, especially if the card was nearly full or the camera was interrupted while writing. That’s why some files come back and some don’t.
I’d still use Disk Drill here because it’s easy to sort photo results and preview what’s real versus junk, but if the scan finds tons of broken files with weird names, that usually points to file system damage rather than simple deletion. In that case, the odds drop a bit, not zero, just lower.
One more thing people forget: check whether the missing shots were recorded in a different format or folder than the visible ones. I’ve seen users think JPGs were deleted when the camera had silently switched to RAW+JPEG or a second DCIM folder. Annoying, but it happens.
If you want more real-world cases on deleted camera photos and SD card recovery, this thread is pretty relevant: how to recover deleted photos from an SD card including JPG and CR3 files.
If the card starts disconnecting, gets hot, or reads stupidly slow, stop. That’s when DIY recovery turns into “oops I made it worse” territory.
One thing I’d add to what @sterrenkijker, @cacadordeestrelas, and @mikeappsreviewer said: check whether the photos are only missing from your computer import, not from the card itself. A lot of camera import apps skip unsupported RAWs, duplicate names, or certain DCIM folders and make it look like files vanished.
My order would be:
- Lock the SD card if you can.
- Browse the card manually, not through Photos/Image Capture only.
- If the files are gone, recover from a card reader, not through the camera USB connection.
I slightly disagree with doing too much folder poking around if the card is acting weird. If it’s slow or throws errors, less handling is better.
For software, Disk Drill is reasonable.
Pros
- Good photo and RAW detection
- Preview helps avoid restoring junk
- Simple enough for non-tech users
Cons
- Deep scans can take a while
- Free recovery limits depend on platform
- Results get messy if the file system is badly damaged
If the recovered photos have gray blocks or half-images, that usually means partial overwrite, and no app fixes that cleanly. At that point, recover what you can and stop retrying scans endlessly.