My Windows PC suddenly shows “The parameter is incorrect” when I try to open my external hard drive. It has important files on it, and I’m worried CHKDSK might make data recovery harder. Should I recover files first or run CHKDSK to fix the external hard drive error?
I ran into this last year with a backup drive, and yeah, seeing 'The parameter is incorrect.' is a horrible feeling. My first thought was that the whole drive was gone. In my case it wasn’t dead, though. Windows just couldn’t read it because the file system was damaged, and I was still able to recover the files.
The main thing is: don’t start “fixing” the drive right away.
Don’t format it just because Windows suggests it. I’d also hold off on CHKDSK until your important files are copied somewhere safe. Those tools can write changes to the disk, and if the drive is already failing, that can make things worse. Unplug it for now, only connect it when you’re actually working on recovery, and don’t save anything new to it.
Rule out the simple stuff first
Before assuming the drive is toast, check the boring things. They really do matter sometimes.
- Try another USB cable.
- Use a different USB port.
- Plug it into another computer.
- See if it shows up in Disk Management.
- Check SMART data with CrystalDiskInfo or Disk Drill.
I’ve had one drive look broken when it was just a bad cable. Another time the problem was a weak USB hub that wasn’t giving the drive enough power. If it’s something like that, you save yourself a lot of stress.
Get the data off before repairing the drive
This is the part I’d focus on first.
Option 1: Disk Drill
This is what I used because it can scan the drive even when Windows Explorer can’t open it normally.
What worked for me was:
- Make a Byte-to-byte Backup.
- Scan that backup instead of hammering the physical drive.
- Run a Universal Scan.
- Preview the files you care about.
- Recover them to a different drive.
The preview step helped a lot. Once I could actually see my photos opening before recovery, I knew the files were still there and stopped panicking so much.
Option 2: Check your backups
If you had File History, Windows Backup, OneDrive, Google Drive, or anything similar running, check that before spending hours scanning. Sometimes the best recovery method is just pulling yesterday’s copy from a backup.
Option 3: Use a recovery lab
If the drive is clicking, constantly disconnecting, or vanishing from Disk Management, I wouldn’t keep trying software. Those are usually signs of hardware trouble, and repeatedly powering it on can lower your chances of getting the data back.
After the files are safe, then try repairs
Once anything important is recovered, then I’d start looking at fixing the drive itself.
The order I’d try:
- CHKDSK, if Windows still sees the file system.
- TestDisk, if the partition shows as RAW or CHKDSK won’t run.
- SFC and DISM, if the issue seems to be Windows rather than the drive.
- A quick format, but only after the important data is recovered.
There’s also one weird Windows setting worth checking: the decimal separator in regional settings. It’s not a common cause, but if you’re seeing this same error in several places and not just with this one drive, it’s worth a look.
When to stop messing with it yourself
Software has limits. I’d send it to a recovery lab if:
- SMART reports serious health problems.
- The drive clicks, beeps, or keeps spinning down.
- It disappears during scans.
- Disk Drill can’t finish because the drive keeps disconnecting.
Most recovery labs will inspect it first and tell you what’s wrong before quoting the job. Many reputable ones also offer no data, no fee.
For cost, logical recovery is often around $300–600. If the drive needs clean-room work or replacement parts, it’s more likely to land somewhere in the $700–2,000+ range.
1 Like
Make an image of the drive before you run any repair command. If the files matter, treat the external drive as read-only until you have either copied the data off or made a sector-by-sector clone/image to another disk. Running CHKDSK first is tempting because it feels like the normal Windows fix, but CHKDSK is not a recovery tool. With repair switches like /f or /r, it can move, delete, or rename damaged file system records while trying to make the volume mountable again.
I agree with @mikeappsreviewer on not formatting and not letting Windows “fix” it right away. My only caveat is that recovery software scanning the original drive for hours can be rough on a failing disk too. If the drive sounds normal and stays connected, making an image first is the cleaner route. Disk Drill can do that, but the important part is the image, not the brand of tool. Once you have an image, scan the image and recover files to a separate drive.
If the external drive shows the wrong size, drops offline, clicks, freezes Disk Management, or makes Windows hang just by plugging it in, stop there. That points more toward hardware trouble than a simple file system error, and repeated DIY attempts may cost you more than CHKDSK ever would. If it stays stable, the order I’d use is: image first, recover important files second, then try CHKDSK or formatting only after you no longer care what happens to the original file system.
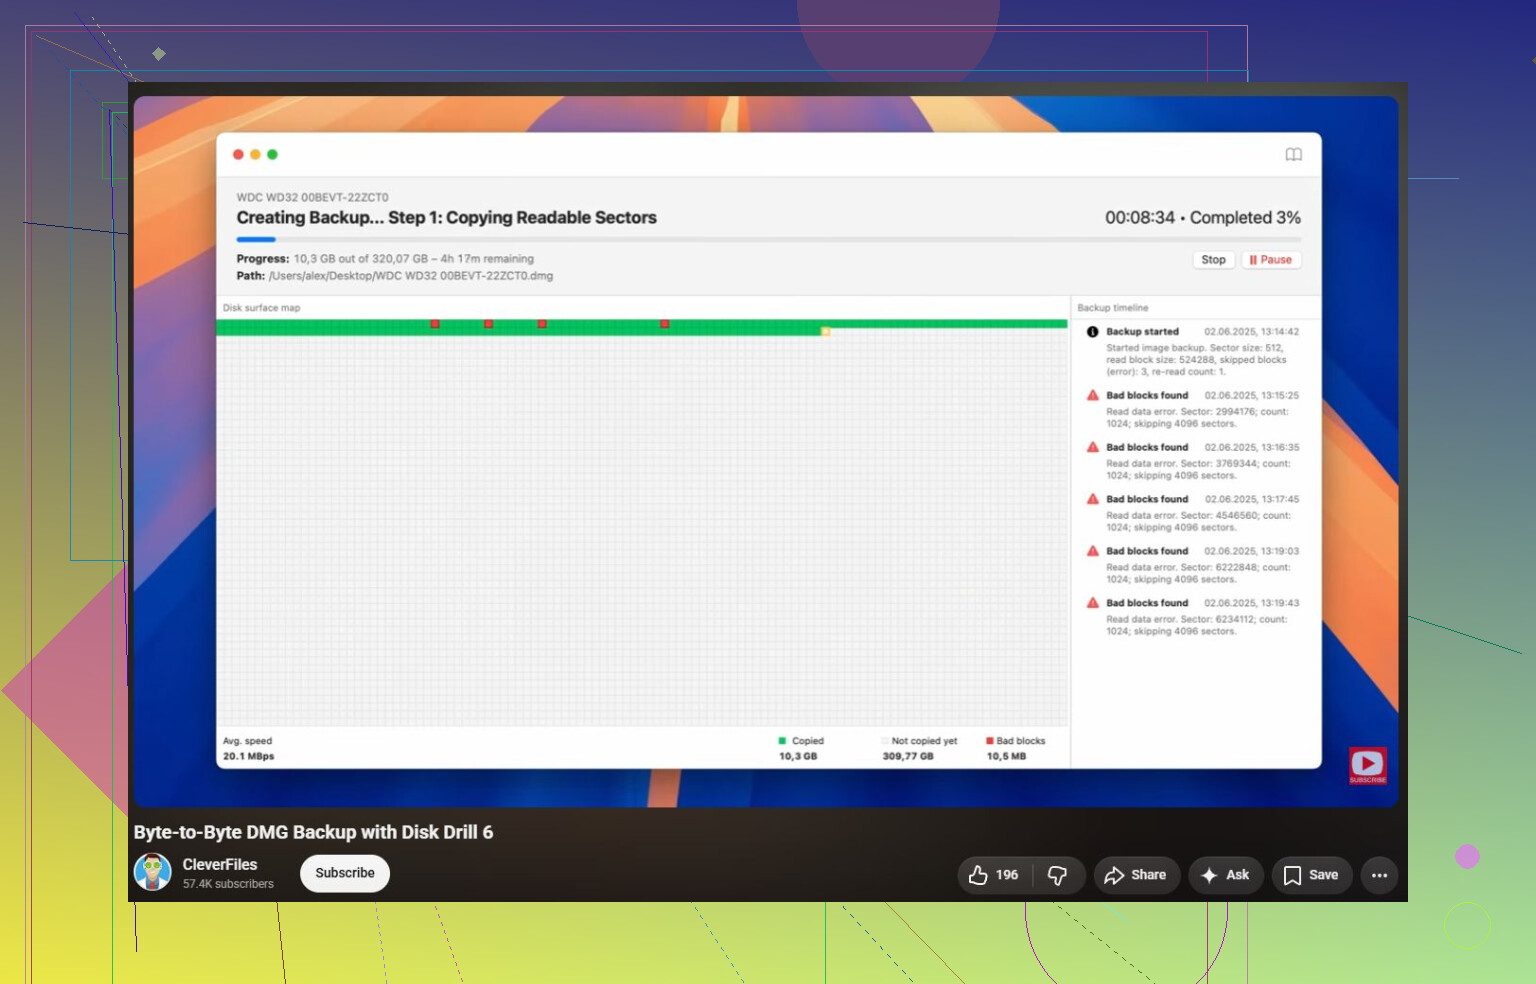
The hidden downside is that Windows may keep poking at the drive even when you are not actively doing anything, especially if Explorer, indexing, antivirus, or the “scan and fix” prompt gets involved. So if the files matter, don’t leave it plugged in while you read guides or install tools. Connect it only when you’re ready to image or copy.
I’d treat CHKDSK as the last step, not the first. It can be perfectly fine on a healthy drive with minor file system damage, but you don’t know yet whether this is minor corruption, a flaky USB bridge, bad sectors, or a dying disk. If CHKDSK starts “correcting” the file system and the drive drops out halfway through, you can end up with a messier situation than you started with.
The order I’d use is simpler than trying every repair trick: make sure you have another drive with enough free space, create an image if the disk stays connected, then recover from that image to a separate disk. Disk Drill is okay for that if you already have it, but the key is not recovering back onto the same external drive. If the drive disconnects, makes noises, or takes forever to read certain areas, stop trying software scans on the original. At that point the safest “fix” is no fix until the data is copied or a lab has looked at it. CHKDSK and formatting are for after the important files are already somewhere else.
Don’t run CHKDSK and don’t try to “move” files off the drive if it briefly opens, because a move deletes from the source as it goes and can leave you worse off if the drive drops.
Copy or image first, recover to another disk, then mess with repairs. CHKDSK is for making the volume usable again, not for preserving the best recovery state.